How to Blur a Face in a Photo: Complete Guide for Privacy & Compliance [2026]
You've got a photo that works. The composition is right, the timing is right, the story is right. Then you notice the problem. A bystander's face is clear in the frame, a child is visible in the background, or a source who should stay private is fully identifiable.
Quick Answer — Blur a face in seconds: the fastest way is to open Blurit Studio, drop your photo, let automatic face detection do the work and export — done in three clicks. For Photoshop, use Gaussian Blur on a Smart Object with an inverted mask (detailed guide below). For batch processing, use automatic face detection in Blurit, iLoveImg or Canva. Want the full guide on privacy, compliance and tool comparisonså Read on.
That's where most quick tutorials stop being useful. They show a blur slider, maybe a mosaic button, and move on. In practice, how to blur a face in a photo depends on what you're protecting, how many images you have, and whether you need speed, precision, or a defensible privacy workflow.
A marketer handling one social post has a different problem from a newsroom reviewing protest photos. A documentary editor has different needs from a public sector team anonymizing stills from CCTV. The method matters because weak blur looks sloppy, inconsistent blur draws attention, and slow manual work falls apart when the volume goes up.
Why Blurring a Face is Crucial in 2026
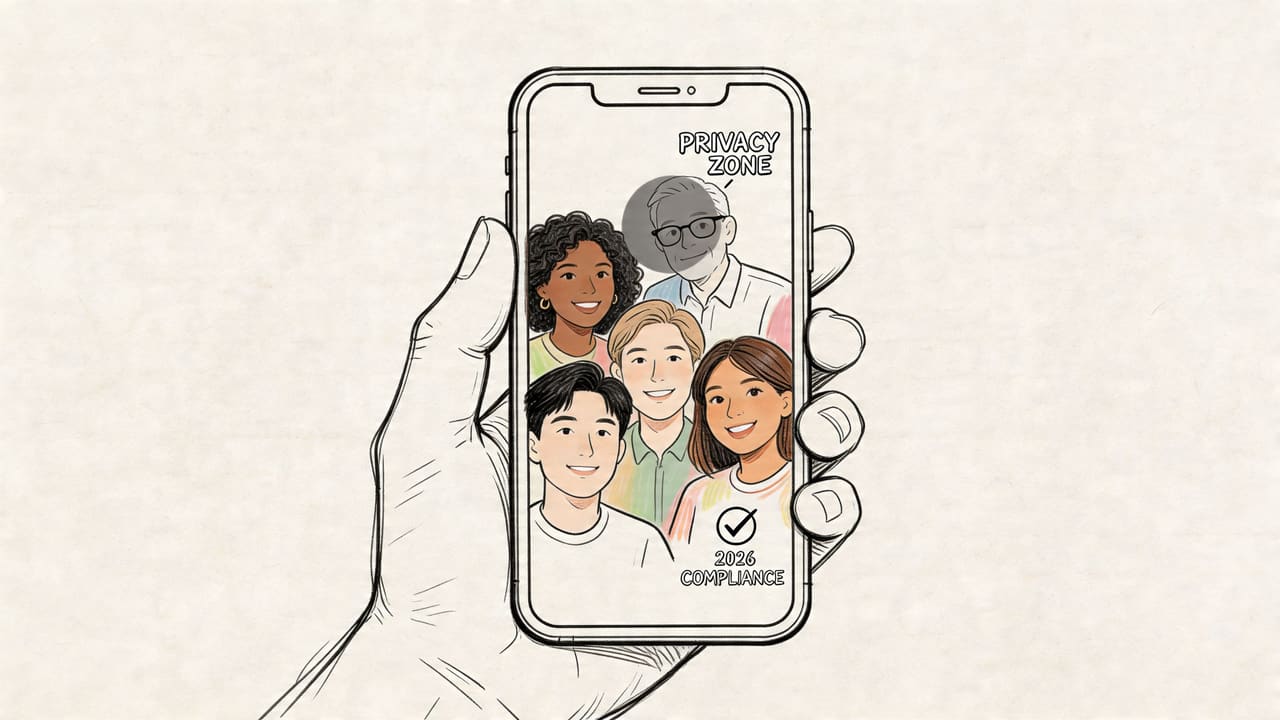
A usable photo can become a legal and reputational problem in one upload. A bystander in the background, a child at the edge of frame, or a visible attendee at a sensitive event can turn an otherwise publishable image into identifiable personal data.
Privacy law raised the stakes
For any team publishing photos at work, face blurring is now part of risk control. GDPR took effect on May 25, 2018, protects over 500 million EU citizens, and allows fines of up to 4% of annual global turnover or €20 million. Regulators had issued €2.7 billion in penalties as of 2023, often involving unanonymized images. Interest in face-blurring tools has also grown sharply since GDPR took effect, according to Imagy's privacy trend analysis on face blurring and GDPR.
The practical point is simple. A face in frame may qualify as personal data. In the wrong context, it can also reveal location, association, health status, or political activity.
The ethical side matters too
Journalists blur faces to protect sources and bystanders. Documentary teams do it to reduce foreseeable harm after release. Brand and marketing teams should apply the same standard, especially for event photography, street content, and user-generated material where consent is often unclear or too broad to rely on safely.
A good operating rule is straightforward.
Practical rule: If a person is not central to the story, campaign, or evidentiary value of the image, anonymize them.
That standard holds up better than case-by-case guesswork, especially once images are copied, scraped, reposted, or pulled into facial recognition systems outside your control.
Blurring belongs inside the production workflow
Teams get into trouble when anonymization is treated as a final cosmetic touch. The decision should happen before publication, while the file is still under editorial or production control, not after it has been uploaded to a CMS, sent to a client, or passed around in review.
In practice, the right approach depends on three factors:
- Who needs protection: a bystander, minor, witness, customer, or confidential source
- How many files are involved: one image, a short set, or a large batch
- What level of protection is required: visual discretion, stronger anonymization, or compliance-sensitive handling
Those factors determine whether a manual edit is enough, whether desktop review makes more sense, or whether automated processing is the safer operational choice.
Choosing Your Blurring Method: A Workflow Decision
Individuals often pick a tool first. Professionals usually do the opposite. They define the workflow, then choose the tool that fits it.
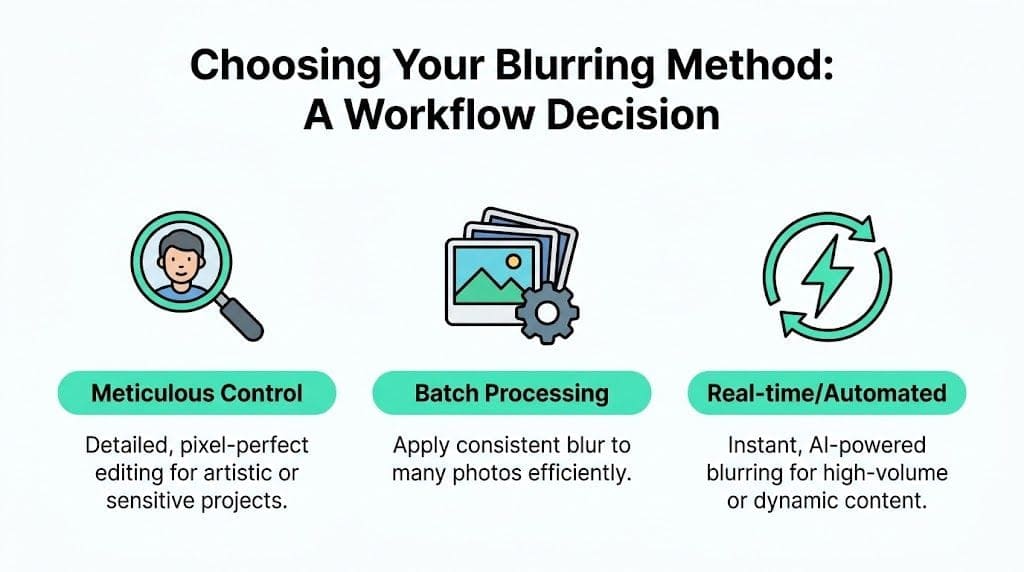
The three real options
You're usually choosing between:
- Manual editing in Photoshop — best when one image needs careful treatment, edge refinement, or art-directed blur placement.
- Desktop software with semi-automation — useful if you already work locally and want faster face detection than pure manual editing, but still want review before export.
- Browser-based AI tools — better when speed, repeatability, and higher-volume handling matter more than brush-level craftsmanship.
The biggest mistake is using manual methods for work that has already become operational. That's where common tutorials fail. They focus on single-image edits that, as Adobe Express-related research summarized in the source material notes, “break down entirely at scale” and don't address browser-based parallel processing or ephemeral file handling for GDPR-sensitive workflows.
Blurring method comparison
| Criteria | Manual (Photoshop) | Desktop software | Browser AI (Blurit) |
|---|---|---|---|
| Speed | Slow for repeated tasks | Moderate | Fast |
| Precision | Highest manual control | Good, depends on tool | Good, with refinement tools |
| Best for | One-off editorial images | Small to medium recurring jobs | Batches, newsroom, legal, marketing, CCTV |
| Crowded scenes | Labor-intensive | Better than pure manual | Strong fit (auto-detection) |
| Consistency at scale | Hard to maintain | Better with presets | Easier to keep uniform |
| Privacy posture | Local editing strong | Depends on export flow | Strong if browser-side |
| Learning curve | Higher | Moderate | Lower for standard tasks |
| Compliance handling | Possible but manual | Depends on setup | Better for ephemeral / no-download flows |
How to choose quickly
Use this shortcut:
- Pick manual editing if the image is sensitive, the composition is complex, and you need selective control around hairlines, hats, hands, or partial obstructions.
- Pick desktop software if your team already edits locally and needs some automation without changing the broader workflow.
- Pick browser AI if you've got multiple files, multiple faces, or a deadline that doesn't allow brushwork on every frame.
If your team handles photos every week, the question isn't whether you can blur a face manually. It's whether that method still makes sense once the work repeats.
That's the key distinction. One image is editing. Fifty images is process.
The Manual Workflow: Precision Blurring in Photoshop
When the photo is important enough, Photoshop still gives the cleanest control. This is the method I'd trust when an image has awkward angles, partial profiles, shallow depth of field, or overlapping subjects.
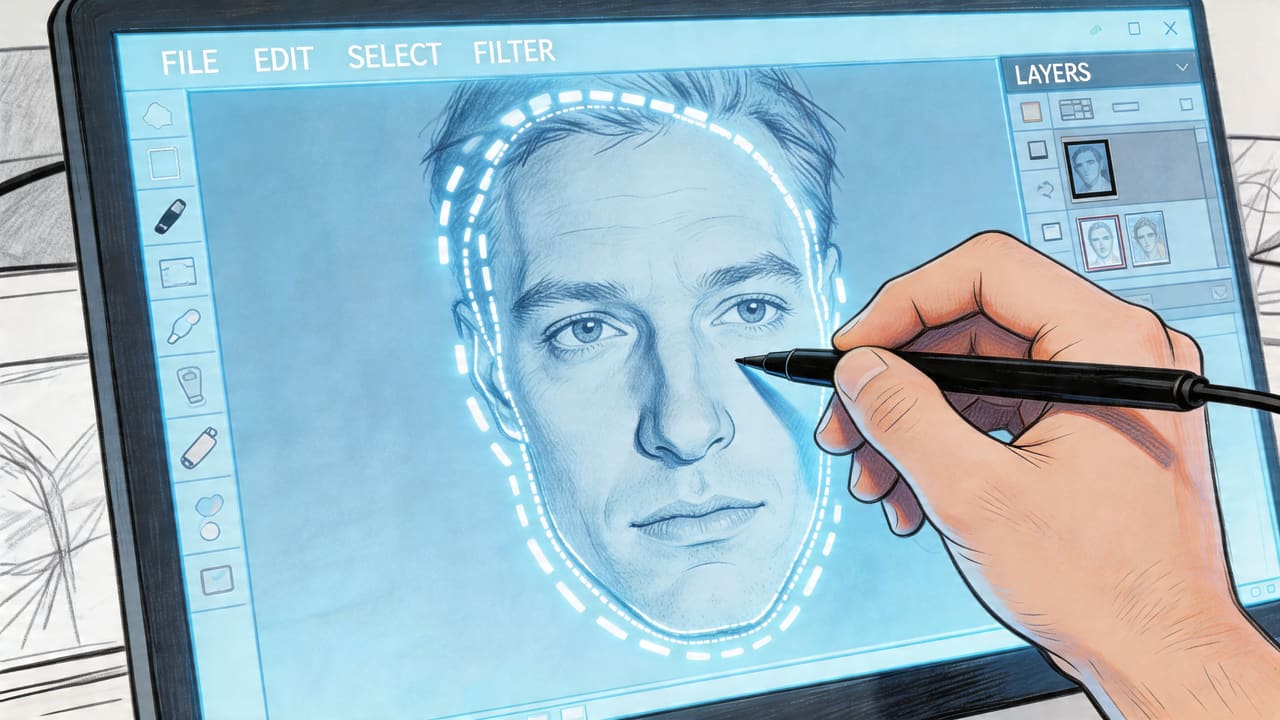
Use a non-destructive setup
The professional standard is simple and solid. Convert the duplicated layer to a Smart Object, apply Gaussian Blur as a Smart Filter, then hide and reveal that blur with a mask.
According to the Photoshop workflow described in this tutorial reference, a Gaussian Blur radius of around 40 pixels is a standard starting point for portrait images. The same workflow uses an inverted black layer mask, then reveals the blur by painting with a soft round white brush at 50% opacity.
That matters for two reasons. First, the Smart Filter stays editable. Second, the mask lets you build the blur gradually instead of stamping on a harsh oval that screams « cover-up ».
The step-by-step method
- Duplicate the image layer. Work on a copy so you always have the original underneath.
- Convert that layer to a Smart Object. This keeps the blur adjustable later. If the blur is too weak or too obvious, you can change it without starting over.
- Apply Gaussian Blur. Start near the standard portrait setting and judge the file visually. Small web images need a different feel from high-resolution editorial stills.
- Invert the filter mask to black. This hides the blur everywhere.
- Paint blur onto the face with a soft white brush. The cited workflow recommends 50% opacity, which is useful because it lets you build intensity in passes instead of making the blur edge look cut out.
- Refine the edges. Watch the forehead line, jawline, and ears. Those areas usually expose rushed work first.
Why this works
Manual mask painting gives you control over shape, softness, and falloff. That's essential when:
- The face is turned and a simple circular selection won't fit
- Hair overlaps the face and needs a softer boundary
- Objects cross the face like microphones, sunglasses, hands, or glass reflections
- The image needs to stay natural in a polished editorial layout
A face blur should hide identity without damaging the rest of the photograph. If the viewer notices the blur before they notice the image, the edit is usually too heavy or too crude.
Where manual editing starts to fail
Photoshop is strong for one image, maybe a few. It becomes a poor fit when every frame from a shoot needs the same treatment.
The bottlenecks are predictable:
- Selection time grows with each face
- Consistency drifts when different editors blur at different strengths
- Review gets messy when crowded scenes require repeated mask corrections
That doesn't make manual work outdated. It just means it's a specialist method. Use it when the image deserves hand-finishing, not because it's the only approach you know.
The Automated Workflow: Blurring Faces Instantly with AI
A newsroom editor sorting protest photos, a legal team reviewing incident stills, and a marketing manager clearing event images all face the same problem. The work is not the blur itself. The risk sits in the face you miss, the inconsistency between files, or the time lost reviewing hundreds of images by hand.
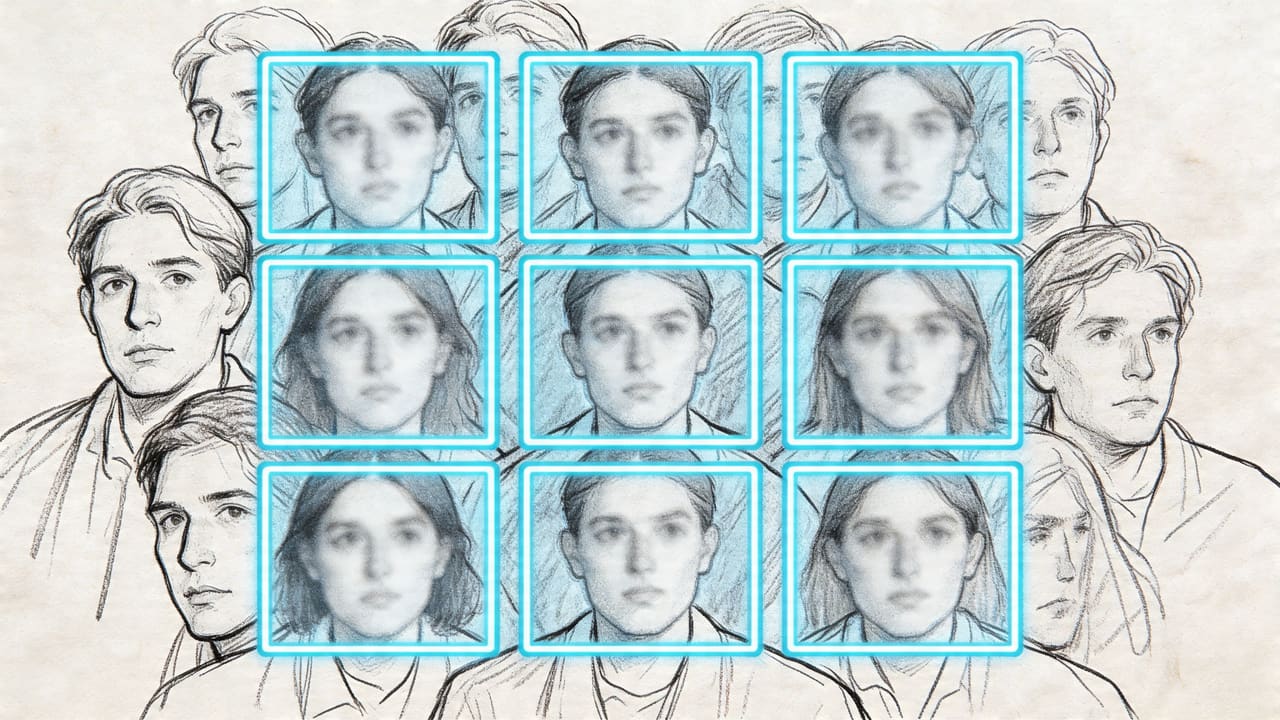
AI earns its place when volume matters. One image can be edited manually. Fifty crowd shots from the same assignment need a repeatable process that finds every visible face, applies the same treatment, and leaves a clear review step before export.
That consistency matters more than speed alone. As a University of Arkansas paper examining anonymization methods notes, privacy-focused pixelation in standard images needs blocks large enough to remove identifiable facial detail, often in the 15 to 20 pixel range. The same paper also explains why automated systems help in crowded scenes. They apply the same obscuring method across multiple subjects instead of relying on an editor to make dozens of separate judgment calls under time pressure.
What an efficient AI workflow looks like
In practice, the fastest safe workflow is:
- Open or upload the image batch
- Run automatic face detection
- Review every box the system found
- Choose the anonymization method based on use case
- Correct misses and false positives
- Export in the final delivery format
Blurit is one example of a browser-based tool that detects faces and supports blur, pixelation, and masking for photo and video. That setup suits teams that want quick turnaround and minimal local processing overhead. It is less suited to cases where policy requires locked-down desktop handling or where every asset needs detailed manual finishing.
How to blur a face in a photo on iPhone
Most iPhone owners want a no-app, three-tap solution. The built-in Markup tool covers the basics; for sensitive content, push to a browser-based AI tool.
- Open the photo in Photos → Edit → Markup (the pen icon).
- Pick the filled rectangle shape, drag it over the face, and set the fill to black or any solid color. For a softer cover-up, use the highlighter at full opacity.
- Tap Done → Save. iOS flattens the markup into the JPG, so the face is no longer recoverable from the file.
Markup has no native « blur » effect, only solid shapes. If you want a real blur (or to handle several faces at once), open Blurit Studio from Safari: it runs in your browser, detects every face automatically, and the photo never leaves your device.
How to blur someone's face in a photo
When you need to protect a specific person — a bystander, a minor, a colleague who didn't consent — the workflow is the same regardless of tool: select the face, choose the strength, verify at export size.
- One face, one photo: Markup on iPhone, Photos on Android, or Preview on macOS is enough.
- One face, several photos: open all of them in Blurit Studio, run auto-detection, deselect the faces you want to keep visible, then export.
- Sensitive context (legal, medical, witness): use pixelation with a 15-20 px block size, or a solid mask, instead of soft blur.
The mistake to avoid is partial coverage — anonymizing the eyes alone leaves the jaw, hairline, and ears as identifying features. Cover the full face plus a small margin.
How to blur your own face in a photo
For self-anonymization (online dating profiles seen by recruiters, forum posts, anti-stalking workflows), you have two options:
- Quick & reversible: add a sticker or emoji over your face in Instagram, Snapchat or any photo app. Fine for casual posts, recoverable by anyone with the original.
- Strong & irreversible: open the photo in Blurit Studio, let it detect your face automatically, switch the effect to pixelation or solid mask, then export a new flattened JPG/PNG. Delete the original from cloud backups if you want true erasure.
If the photo is going on a public profile or could be scraped, prefer the second method. Soft blur on your own face is recoverable through deblurring algorithms with high accuracy, especially at high resolution.
How to blur out a face in a photo (the safest defaults)
If you're not sure which effect to pick, this is the safe ranking from weakest to strongest:
- Soft blur — fine for casual publishing where the goal is to reduce recognition.
- Pixelation (15-20 px blocks) — the right default for sensitive content. Removes facial structure in a measurable way.
- Solid mask — the conservative option for legal review, child privacy, witness protection, or any case where partial recognizability is unacceptable.
For batches, automatic detection plus pixelation is usually the best speed-to-safety trade-off. Pair it with a quick visual review at full export size before publishing.
Choose the effect based on risk, not habit
Soft blur looks cleaner in editorial and branded content, but it can preserve more structure than people expect, especially in high-resolution files.
Pixelation is usually the safer default when identity protection is the priority. It degrades facial detail in a more obvious, measurable way. Solid masking is the conservative option for legal review, child privacy, witness protection, or any situation where partial recognizability is unacceptable.
Here's the demonstration format many teams prefer before rollout:
Where AI still needs a human check
Automated detection is a first pass, not final approval. Review catches the failures that create real exposure:
- Faces cut off at the edge of frame
- Side profiles and tilted heads
- Reflections in mirrors, vehicles, and shop windows
- Faces on screens, posters, or printed materials inside the scene
- Other identifiers such as badges, license plates, and tattoos
For one-off files, that review takes seconds. For high-volume teams, it becomes a defined QA step. That is the core value of AI in face blurring. It reduces repetitive selection work, then lets editors, compliance staff, or producers spend their time on verification instead of drawing masks from scratch.
Ready to Blur Faces Faster?
Blurit handles single photos and batch processing with automatic face detection and browser-side processing.
Start Blurring FreeAdvanced Techniques for Professional Anonymization
The easy cases don't cause trouble. The trouble starts when the face isn't cleanly visible, the shot is wide, or the anonymization has to preserve the image's editorial value.
Handle difficult angles and partial obstruction
Tilted faces, side profiles, and faces partly hidden by hair or objects often fool both manual selections and auto-detection. In those cases, don't blur only the visible eye or cheek and assume that's enough. Expand the treatment to cover the full recognizable facial region, including contour and nearby distinguishing features if needed.
A source video on professional workflows notes that partially obscured faces, tilted angles, and selective blurring while maintaining 4K quality are common problem cases, and that 65% of creators reported workflow disruptions from manual blurring. The same source points to browser-side AI services with canvas refinement tools and REST APIs as an emerging answer for professional use cases in these tougher scenarios, as described in this workflow-focused video reference.
Use selective anonymization carefully
Sometimes you want the opposite of « blur the subject ». You want the subject sharp and everyone else protected. That's common in interviews, documentaries, event recaps, and internal communications.
The safe approach is:
- Lock the approved subject first
- Apply consistent anonymization to the remaining faces
- Check the background for secondary identifiers
- Review at export size, not just zoomed in
Selective anonymization works well when the scene still needs emotional clarity. It fails when the contrast between one untouched face and many blurred faces creates an unintended spotlight on the protected group.
The more sensitive the context, the less you should optimize for aesthetics alone. Privacy has to win the argument.
Choose the effect based on threat level
Not all obscuration methods are equal.
- Soft blur is fine for casual publishing where the goal is to reduce recognition.
- Pixelation is stronger when you need to destroy facial detail.
- Solid masks make sense when there's no tolerance for residual recognizability.
For sensitive work, I'd avoid relying on weak, decorative blur. If the image could expose a witness, minor, patient, employee, or bystander in a risky context, use an effect that leaves little room for reconstruction or interpretation.
Don't forget non-face identifiers
Professional anonymization isn't just about faces. You should scan for:
- License plates
- Name badges
- Computer screens
- Distinctive tattoos or uniforms
- House numbers and signage
A face can be hidden while the person remains obvious. That's a failed anonymization job, even if the blur itself looks clean. For the text and document side of the same problem, see our guide on how to blur text in images, PDFs and videos.
Conclusion: Your Next Step to Fast and Secure Anonymization
The right method depends on the job.
If you're working on a single important still and need edge-by-edge control, Photoshop remains the strongest manual option. If you're handling recurring batches, crowded scenes, or privacy-sensitive production, automated detection makes more sense because it reduces repetitive labor and helps keep treatment consistent.
That's the key shift in how to blur a face in a photo in 2026. The question isn't just how to apply an effect. It's how to choose a workflow that matches the risk, the volume, and the review standard your team needs.
For most professionals, speed alone isn't enough. You also need a process that doesn't create new privacy problems while solving the visual one. That's why browser-side processing, selective control, and repeatable review are becoming standard requirements rather than nice extras.
If your current method involves opening images one by one and brushing over faces manually, it's worth testing a workflow that handles detection first and lets you spend your time on review instead.
Frequently Asked Questions About Blurring Faces
Sometimes, yes. That depends on how weak the blur is, how large the original image is, and whether enough facial structure remains visible. If the outcome is critical, don't use minimal blur for appearance alone. Use stronger pixelation (15-20 px blocks) or a solid mask and inspect the result at the final export size.
No. Face blurring helps, but it doesn't automatically remove all identifying information. Clothing, context, location, badges, tattoos, and other visible details can still identify someone. Legal risk depends on the jurisdiction, the use case, and everything else the image reveals.
For one casual image, a simple photo editor or built-in markup tool may be enough. For anything sensitive — or for several photos at once — open Blurit Studio in your browser: auto-detection finds every face, the photo stays on your device, and there's no signup for basic use.
Use blur when you want a cleaner visual result and the privacy need is moderate. Use pixelation when identity protection matters more than appearance. For the most sensitive cases (witnesses, minors, medical), a solid mask is often safer than either.
Don't judge it only while zoomed way in. Review the image at normal viewing size, then zoom in and inspect the eyes, nose bridge, mouth shape, and face outline. If those features still read clearly, strengthen the effect or switch to pixelation.
Yes. It can miss edge-of-frame faces, reflections, profiles, or partially blocked subjects. Automated tools save time, but they still need human review before publication or disclosure.
Related guides: how to pixelate a picture online for irreversible anonymization · AI face blur for videos for automated video processing · how to blur text in images for redacting sensitive information · blur a face in photos & videos · what does « redacted » mean.