How to Blur a Video on Android: Best Apps & Methods [2026]
You've got a good clip on your phone. Then you notice the problem. A child walks through the frame, a license plate sits in the background, a laptop screen shows internal data, or someone agreed to talk on camera only if you hide their identity.
That's usually when people search how to blur a video on Android and end up with tutorials that treat every job the same. They aren't the same. A quick Instagram edit, a newsroom anonymization task, and a compliance review for internal footage need different tools and different standards.
On Android, there are three practical routes. You can edit manually in an app and place the blur yourself. You can use an automated AI anonymization workflow that detects faces or objects for you. Or, if you're handling repeatable workflows at scale, you can use a developer-oriented setup with API-based processing and batch handling.
Each path works. Each path also fails in specific ways. The right choice depends on whether you care most about speed, precision, privacy handling, watermark-free output, or repeatability across many files.
TL;DR — Quick answer
The fastest way to blur a video on Android:
- Blurit (browser, AI automatic) — Upload your video, auto-detects faces & plates, export in 4K. No app install. Try Blurit free →
- PutMask (Android app, manual) — Free app, good for short clips with one subject. Google Play.
- CapCut (Android app, manual) — Best for creative blur effects and background blur. Free with watermark option.
If your footage contains sensitive people or identifiers, use an AI tool (Blurit) — manual apps miss frames on moving subjects.
Why you need to blur a video on Android
Individuals often start with a simple need. They don't want to reshoot the video, but they can't publish it as-is. Android makes that fix accessible, but the reason for blurring matters because it affects how careful you need to be.
If you're posting social content, blur can remove distractions and keep attention on the subject. If you're working in journalism, legal review, security, HR, or public sector communications, blur is about identity protection and controlled disclosure. Those are different stakes.
Common situations where blur matters
- Public filming: bystanders who didn’t agree to appear in a published clip.
- Sensitive interviews: anonymity for the speaker while keeping footage usable.
- Workplace footage: training or internal docs accidentally show names, screens, or proprietary material.
- Marketing edits: soften the background and keep attention on the foreground subject.
- Security video review: share footage without exposing unrelated people.
Practical rule: Decide first whether you're creating an effect or protecting information. Those are two different jobs, and they should be edited differently.
On Android, the big split is between manual post-production blur and automatic detection-based anonymization. There's also a third category people often forget, which is real-time blur during recording. That can be useful for creators, but it isn't the same as reviewing and anonymizing already-recorded footage.
Choosing your Android video blurring strategy
Choose the workflow before you start editing. That decision determines how much time you spend, how likely you are to miss a frame, and whether the result is just visually softer or reliably safe to share.
If you're working with photos rather than video, see our guide on how to blur a face in a photo.
A phone editor, a browser-based AI tool, and an API pipeline can all blur video on Android. They do not solve the same problem.
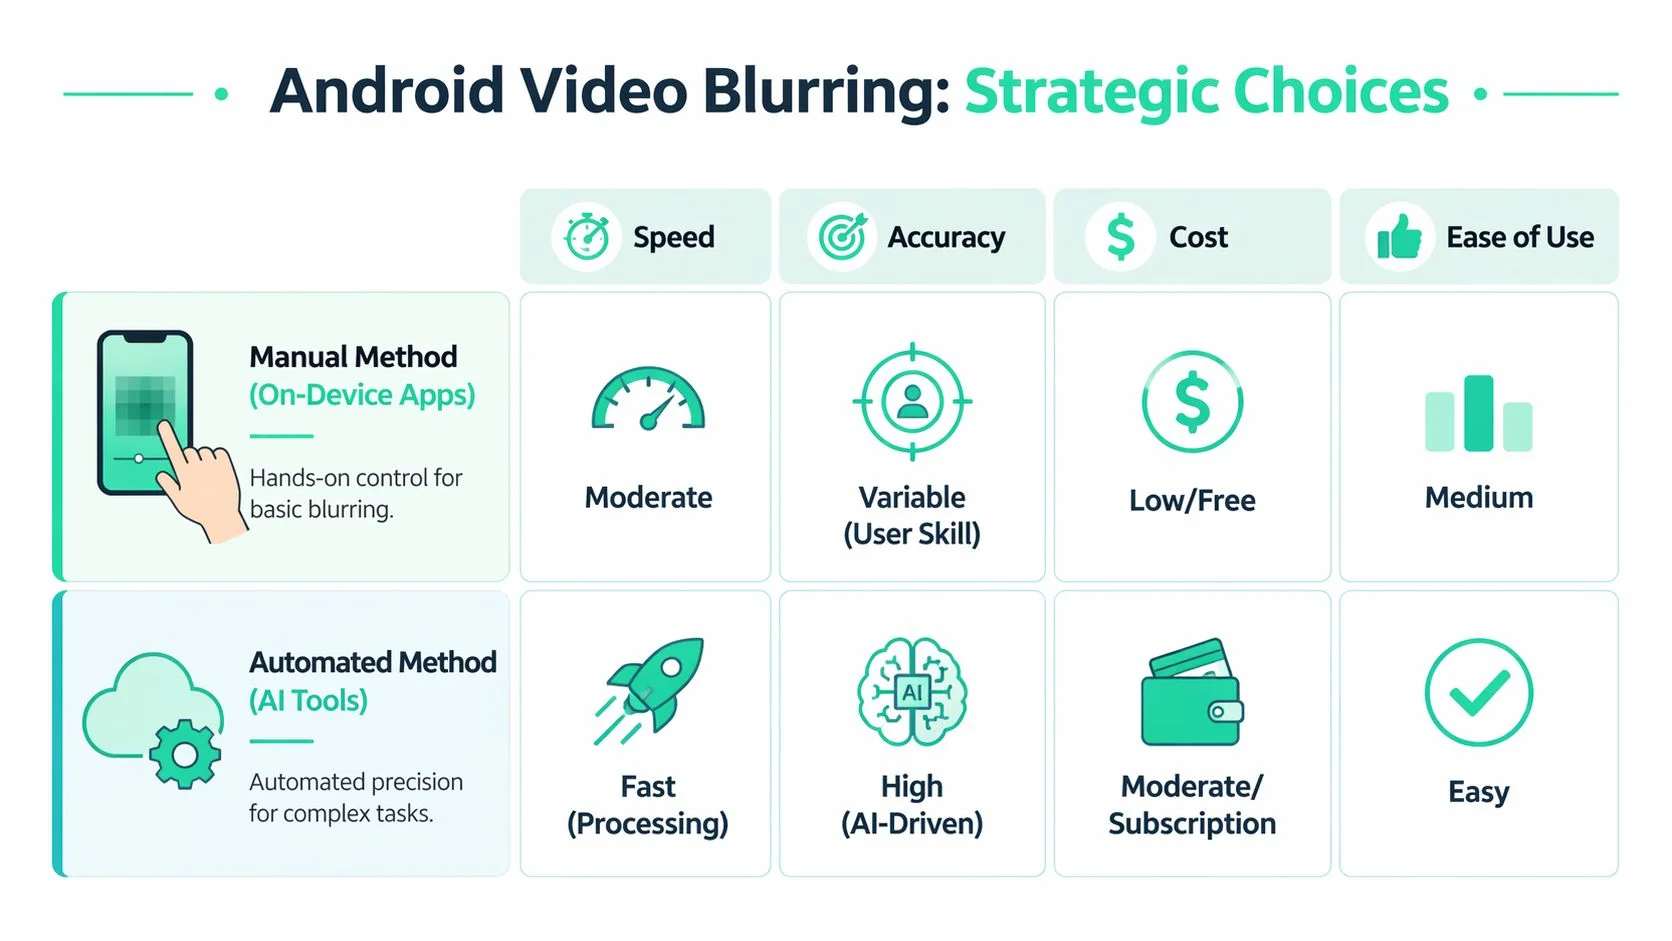
Manual app editing gives you direct control over placement and timing. It works well for a short clip, one subject, and a clear frame where you can watch the whole sequence closely. Automated anonymization is built for repeated privacy tasks such as detecting faces, license plates, or other identifiers across longer or busier footage. API-based workflows fit teams that process videos at scale and need the same rules applied every time.
The four trade-offs that matter
Speed. Manual blurring is slow in practice. Automated tools usually win on total time once detection is reliable, especially across multiple clips.
Accuracy. Manual work can be very precise on a simple shot. Accuracy drops fast when subjects turn, cross paths, leave frame, or reappear. Detection-led tools usually perform better on repetitive anonymization because they check every frame systematically.
Privacy handling. On-device apps keep footage local, which may be safer for sensitive material. Browser tools vary a lot. Some process transiently, some store uploads, and some offer enterprise controls. For regulated footage, those details matter as much as the blur itself.
Cost. Free or low-cost apps look cheaper until the job takes an hour per clip. Automated tools add direct software cost but often reduce labor, review time, and rework.
Comparison of Android video blurring methods
| Method | Best for | Speed | Accuracy | Privacy | Cost |
|---|---|---|---|---|---|
| Manual app editing | One-off edits, simple scenes | Moderate | Variable | Strong when local | Low / free |
| Browser-based AI | Faces, plates, sensitive footage | Fast | High for detection tasks | Depends on tool | Moderate |
| Developer API | Batch & automation | Fast once integrated | Consistent | Depends on deployment | Variable |
The manual method using on-device editor apps
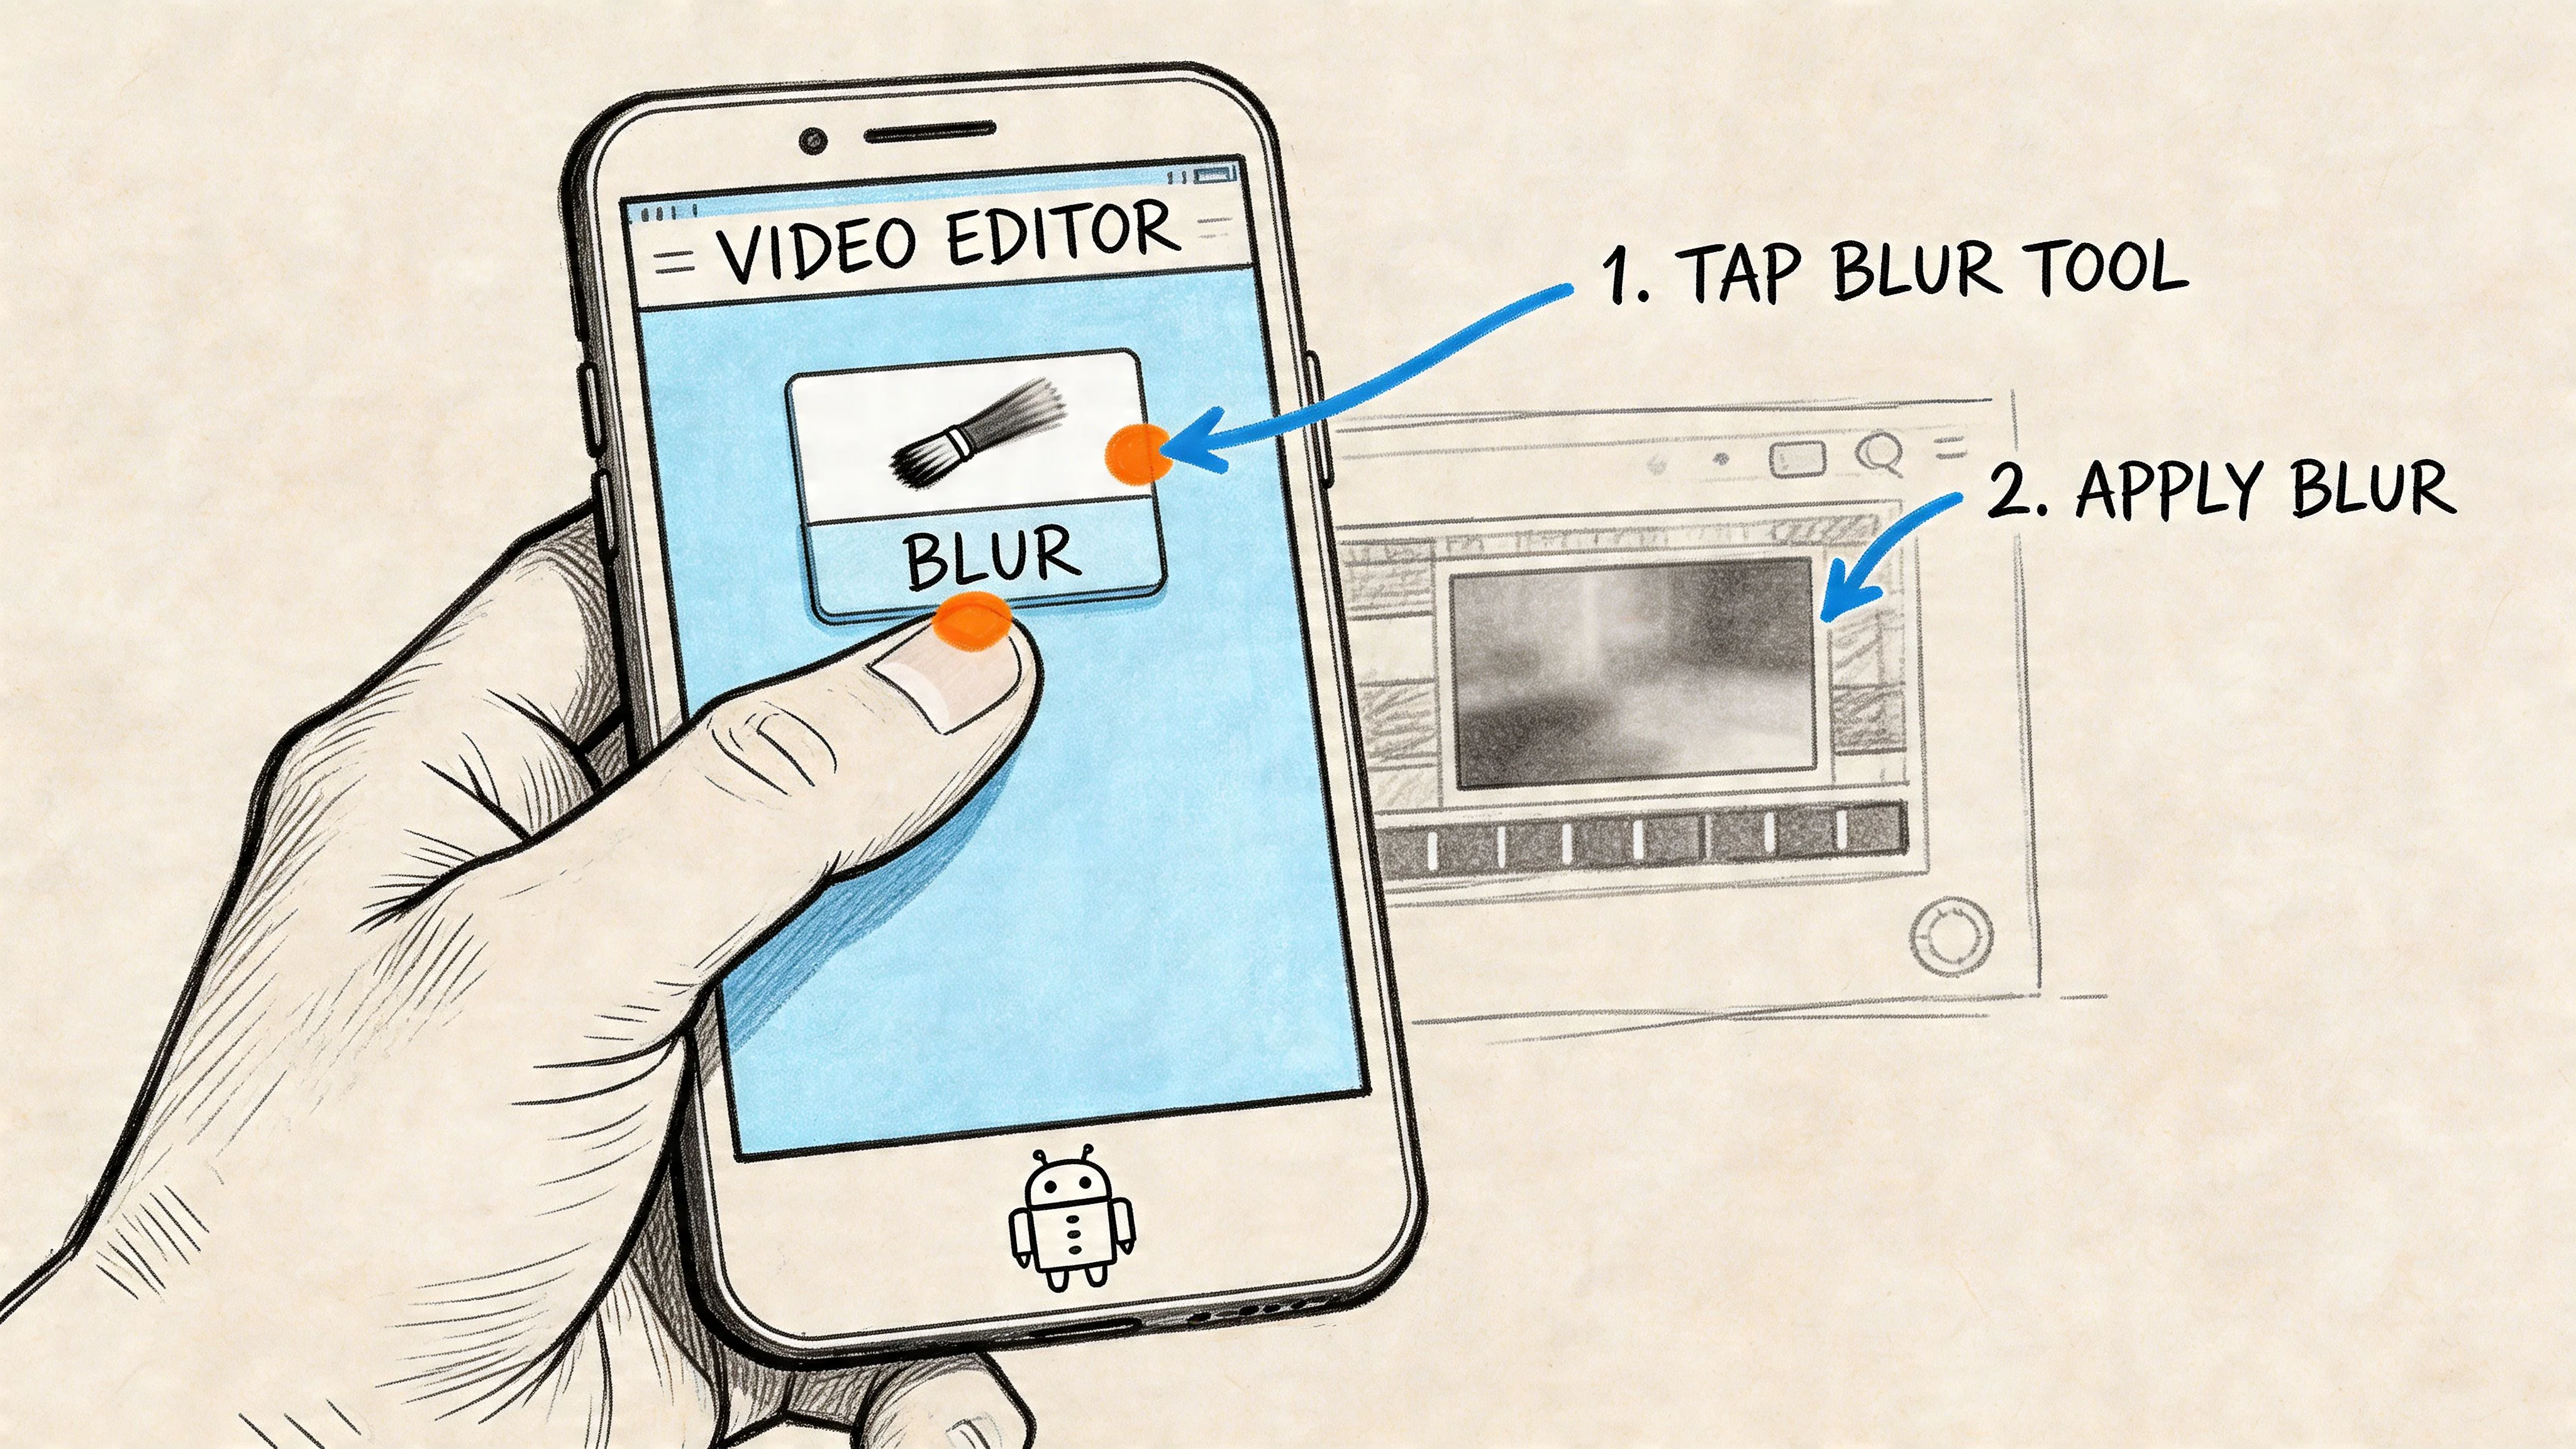
How the manual workflow actually works
- Import the clip
- Trim the section that matters
- Apply blur, mosaic, or pixelation
- Position the mask
- Adjust across time (keyframes / re-detect)
- Preview the full clip
- Export and check frame by frame
A grounded example using PutMask
PutMask is a useful example because it is built for face blurring rather than full timeline editing. The practical steps: grant media access, choose Pixelate your video, import and trim, run Detect Faces on the first frame where the subject appears, repeat detection when the person moves, adjust box size, then export and inspect.
How to blur a video on Android with AI (browser workflow)
A common Android privacy job looks like this: you record street or event footage, then realize several faces, plates, or badges are visible. Manual masking stops being a quick edit and becomes a review problem. Automatic anonymization changes the job from frame editing to quality control.
A 2025 video analysis of Android blurring gaps argues that many tutorials focus on visual editing while giving less attention to privacy-oriented automatic detection for faces and license plates.
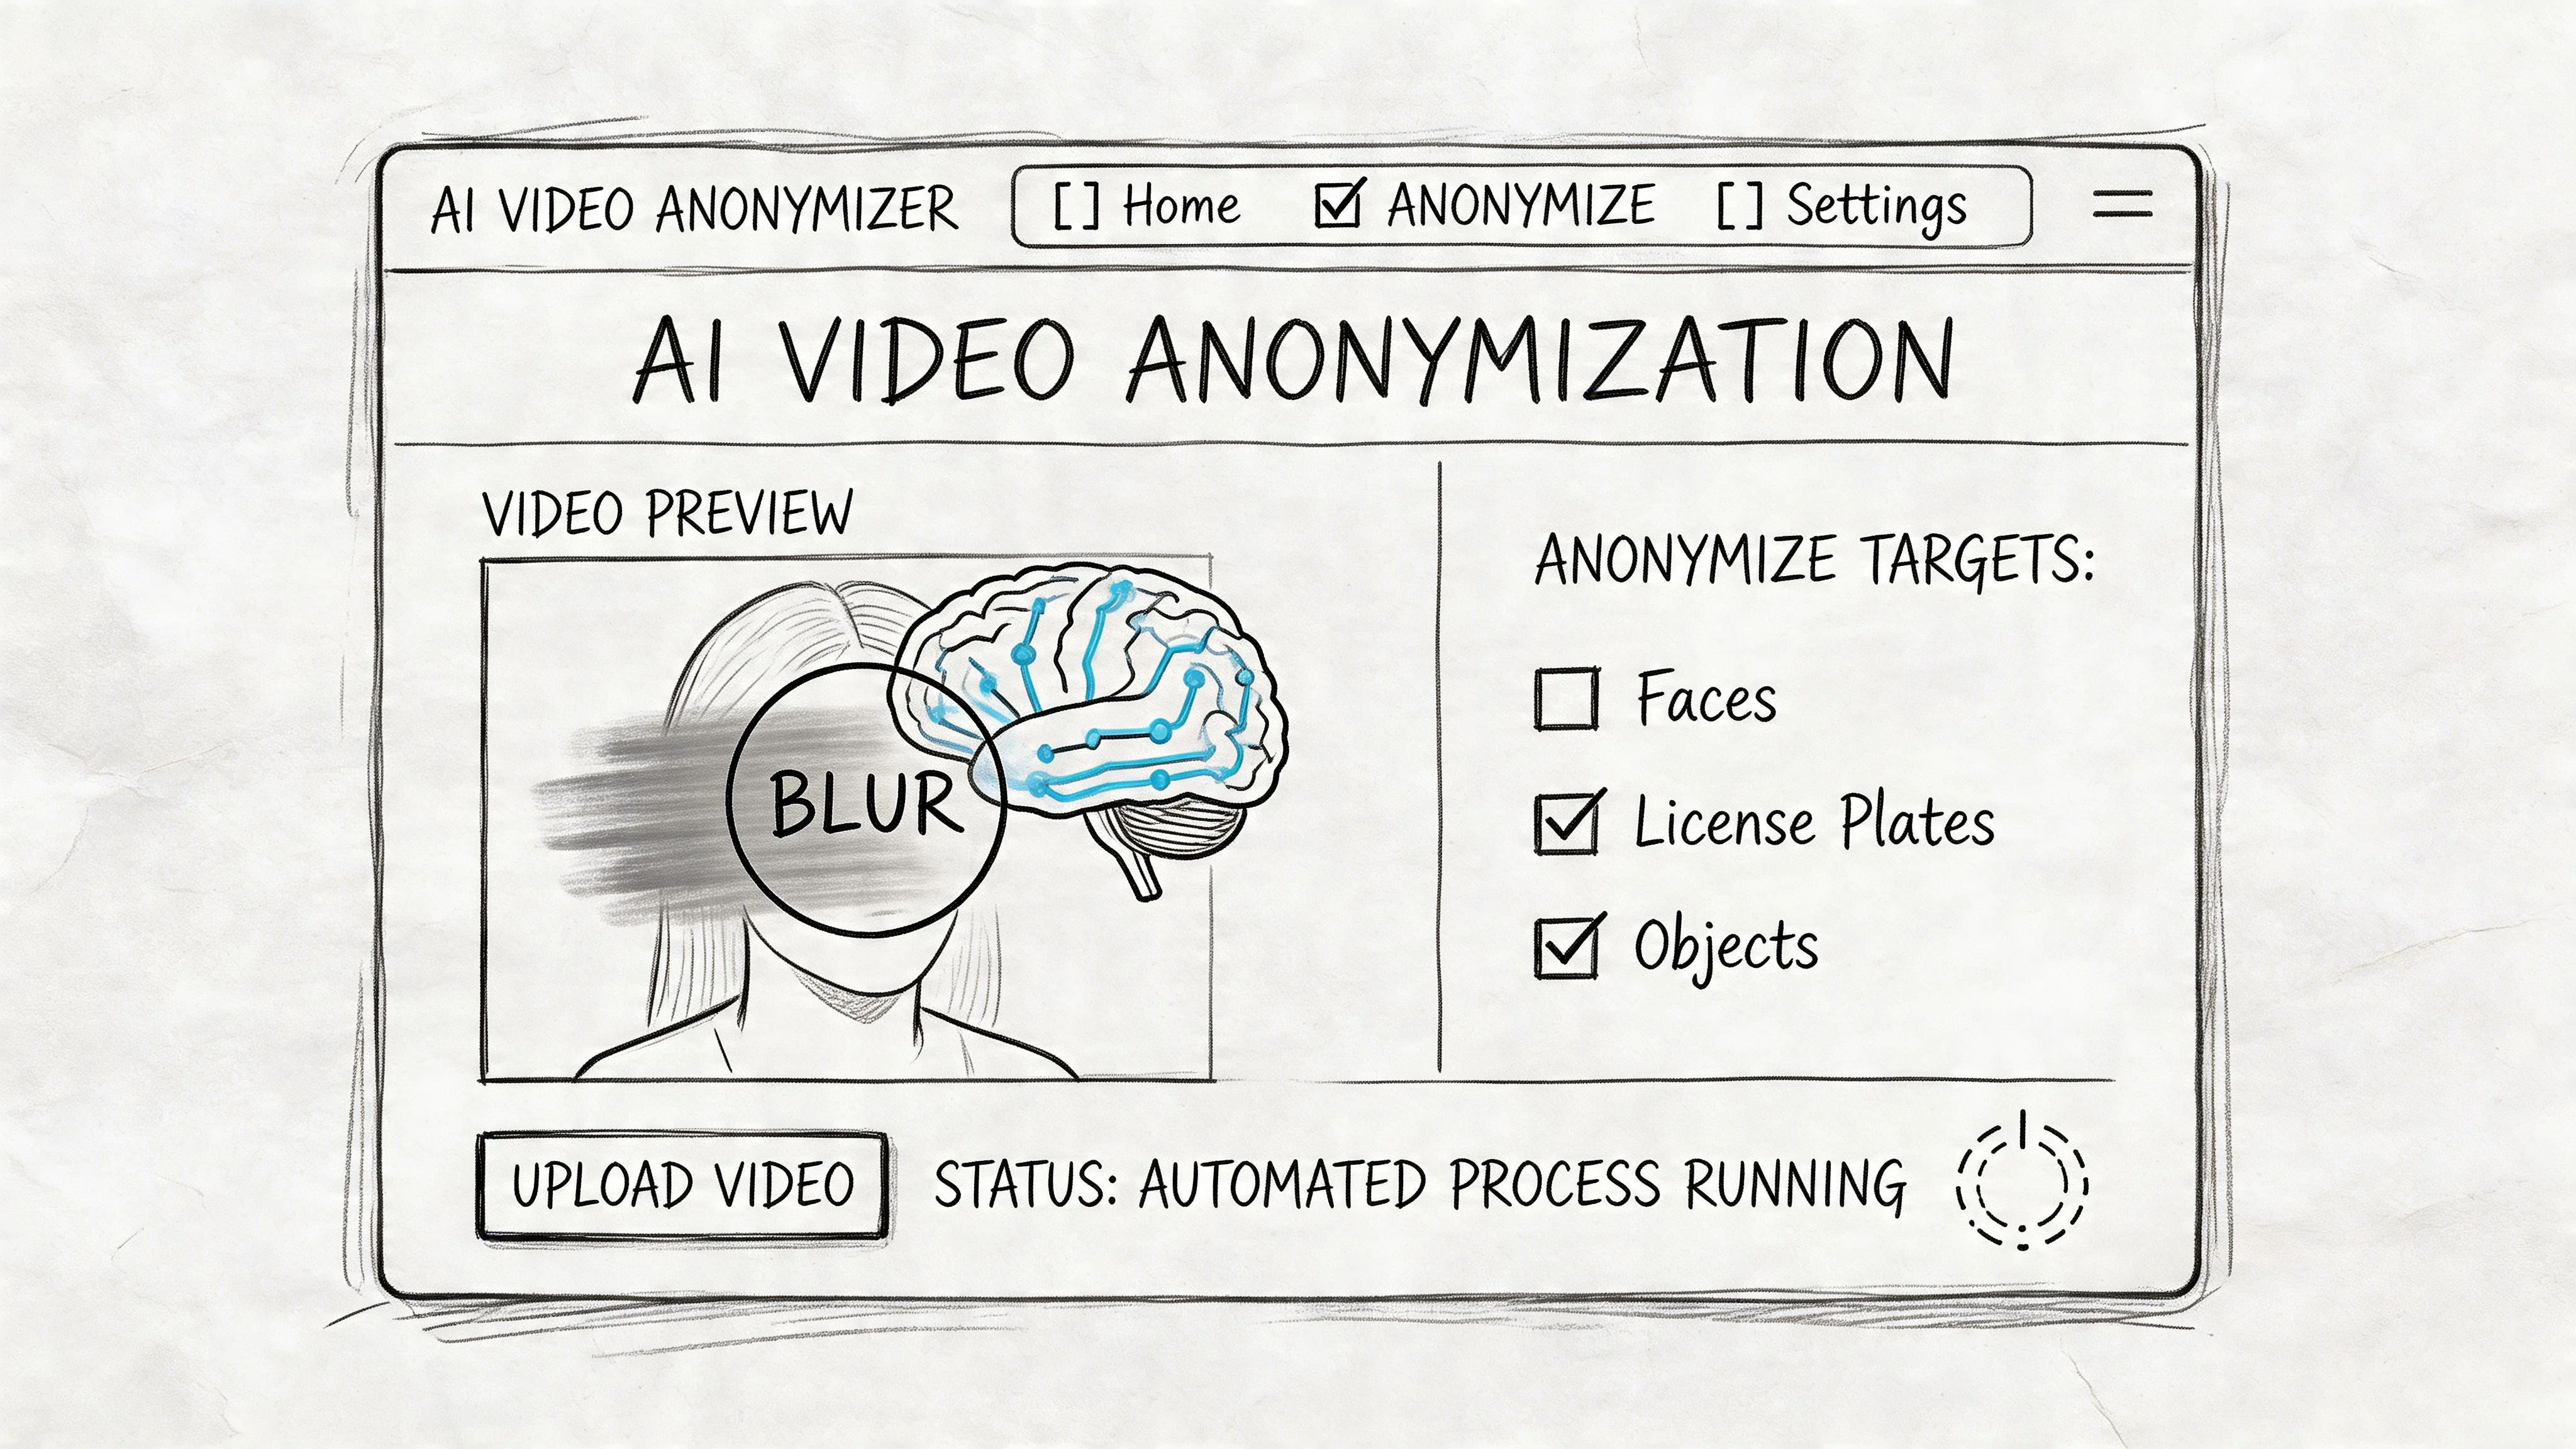
What the workflow looks like
- Upload the video
- Run automatic detection
- Review detections and fix misses
- Export the sanitized file
Blurit is one example in this category. It is a browser-based service that detects faces, license plates, and other sensitive objects automatically, supports selective blur modes, and offers REST API and edge deployment options for teams that need workflow integration. Start free →
Advanced techniques for professional results
Motion tracking and CapCut on Android
CapCut is a practical reference for many Android users. A CapCut Android workflow demonstration shows selective blur using splits, blur effects, overlays, masks, and keyframes.
Selective blur and inverse-background blur
Some projects need anonymization. Others need subject isolation. Android editors often use a duplicated layer, a subject mask, and an inverted blur effect. That can look clean in a controlled shot.
For still images, pixelation is often stronger than blur — see how to pixelate a picture online.
Exporting your blurred video and best practices
A blur job isn't finished when the mask looks right in preview. It's finished when the exported file stays anonymized on the platform where it will be viewed.
A review checklist before publishing
- Pause on entrances and exits
- Watch at normal speed and frame by frame
- Check reflections and screens
- Confirm irreversibility for privacy use cases
- Review the exported file on the target platform
Frequently asked questions
For quick edits on short clips, PutMask and CapCut are solid free options on Google Play. For sensitive footage with moving faces or license plates, Blurit (browser-based, free tier) offers automatic AI detection that manual apps can't match.
Yes. Browser-based tools like Blurit work directly from your Android phone's browser — no app install required. Upload your video, let AI detect faces automatically, review, and export.
In CapCut: import your clip → Effects → Video Effects → Blur. For subject-preserving background blur, duplicate the layer, apply blur to the bottom layer, and mask the subject on the top layer.
Re-encoding always introduces some quality change. To minimize loss: export at the original resolution, avoid unnecessary format conversions, and check the exported file before sharing.
Public filming laws vary by country. In most EU countries, publishing identifiable footage without consent requires a legal basis. Blurring reduces privacy risk but does not replace legal judgment for sensitive footage.
Ready to blur your Android video without the manual work?
Blurit runs in your Android browser — no app install, no watermark on free exports.
- AI auto-detects faces, license plates, and sensitive objects
- Works on videos up to 4K
- Browser-based: footage stays secure, no desktop needed
- Manual refinement if AI misses a frame
- Free to start